What is Imaging in Computer Forensics and E-Discovery?
- 28/06/2018
- Posted by: Alistair Ewing
- Categories: Computer Forensics, Investigative Techniques
DISCLAIMER
Only a qualified computer forensics expert from a company such as Compute Forensics should be selected to perform forensic data collection. You can call us on +44 (0)203 5989658, email us at expert@compute-forensics.com or ‘Live Chat’ to a computer forensics expert witness by clicking on the red tab at the left of the website. Compute Forensics offers a global collection service for e-Discovery firms, Digital Forensic firms and businesses under litigation. Compute Forensics can provide training and equipment to IT departments that require the collection skills themselves as to give a lightning response that is needed when the need arises.
Introduction
This article is designed to be a general overview of the actions, programs and techniques used in data collection before scenarios such as a digital investigation of a recently departed employee or for an e-Discovery litigation hold.
What is Forensic Imaging?
Forensic imaging, in a nutshell, is the act of gathering data in a court accepted fashion from digital media to a Veracrypted encrypted output device where possible. That data may come from a live system, a dead PC, DVD, iMac, USB disk, X-Box or remote mailbox. Those are just a few examples.
Typically, the source media should be placed into a blocked state when being read and the data outputted to an attached destination disk with read/write access. It is essential contiguous notes of the system and steps taken are made while the imaging is taking place. The forensic imaging should be done by a certified, experienced digital forensics expert witness or at least an individual with collection training and IT knowledge.
On certain occasions blocking writes to the source media may not be possible such as if you are presented with a live system server or an encrypted system that is discovered switched on. In these instances, the image must be taken live as not to disturb a server or re-encrypt an unlocked disk.
In addition to noting the collection process, it is important to note the physical location of the evidence and store it in a compliant manner and always gain signatures when handing over data.
Tip: As a rule, if the system is switched off leave it that way. If it is changed on leave, it switched on but take the computer, laptop or phone off the network and connected to power. For a computer that may mean unplugging the network cable, sliding a switch to ensure WIFI is off, pulling out a dongle, popping out a network card or disabling networking in the control panel of the operating system. For a tower computer, it may mean just pulling out the Ethernet cable.
What is a Physical Forensic Image?
A physical forensic image is a full ‘bit for bit’ copy of the particular media. This includes every byte of data from the live file system to the unallocated deleted areas of the disk.
The forensic image may be outputted in some formats such as a simple format agnostic raw dd image format, the common EnCase E01 evidence image or the less common Advanced Forensics Format (AFF). If you wrote this forensic image back to a disk in its raw format (FTK has this functionality) with the same capacity, it would be identical in every way to the original. From this image, a computer forensic analysis would be conducted as not to risk damaging the original.
I have personally experienced occasions where forensic software wasn’t used to collect the data for some reasons like a RAID wasn’t being recognised on older systems or the disk was not being read in Windows. In these instances, something akin to a bootable Clonezilla Live distro may be used to produce the image. When doing so always explain your reasoning in notes and find the verify or MD5 hash the result if necessary. Getting something is better than walking away with no data at all. Again this should always be done by a qualified person that is well versed in forensic imaging.
What is a Logical Forensic Image?
A logical forensic image or skeleton image is a particular copy of certain files from a source. Many programs can produce logical images: Stefan Fleischmann’s excellent X-Way’s Imager, the superb and free FTK Imager or new on the scene Magnet’s Acquire software can be used to do this in a Windows environment.
A logical acquisition is the option to use if the digital expert requires a targeted collection for litigation reasons, just a few files of interest are needed, or the client collect wishes you to collect from one or more custodian’s user profiles from a server that may have many users.
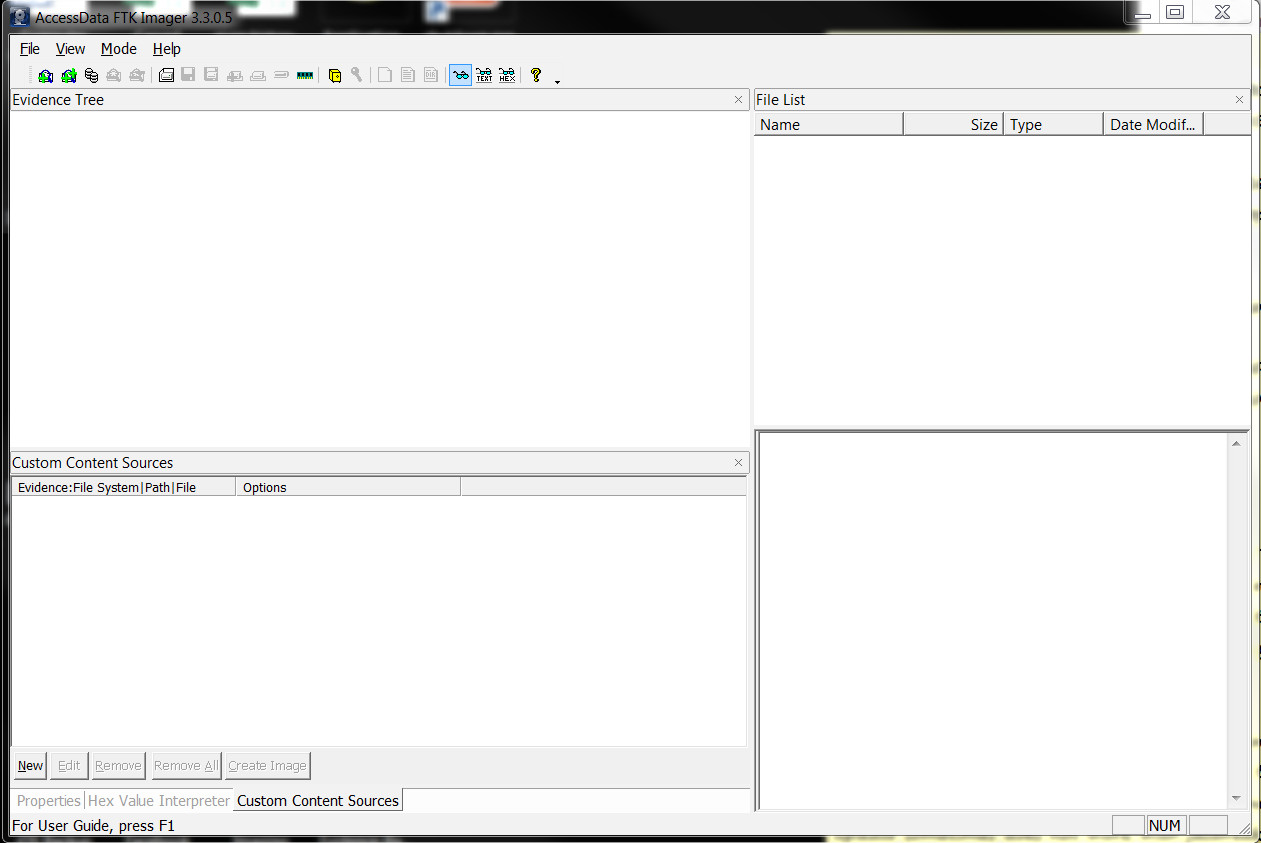
In an active state, FTK Imager Lite as shown in Fig 1, can be executed from the destination disk on the computer you wish to extract from as not to write to the live computer by installing software to the source. A custom content list can be built into the programs user interface, and a logical forensic image file is thus produced.
FTK Imager can be used to mount forensic images to view in Windows Explorer, build custom content images of live machines, image RAM (random access memory) from a live system, view and export from Linux/Mac/Windows filesystems and most commonly forensically image a hardware or software writeblocked device to an external disk. FTK Imagers only drawback is when an examiner images a damaged disc the software fills in the unreadable sectors with 0’s. Not attempting to read the drive is unacceptable when a data recovery solution such as ‘ddrescue‘ may recover a whole email collection where the forensic tool fills what it can’t read with 0’s. In an investigation or legal hold, every byte counts! I have been the examiner that has acquired 100% of an image where others had to explain in court why some sectors weren’t imaged.
Fig 1 FTK Imager Version 3.3.0.5 the Crème De La Crème of Forensic Imaging Tools
On a live Mac you may want to produce a full image using a bootable Linux forensics distribution such as Caine then go on to build a list from that main image onsite should the client not want all the data walking off site. There are other solutions like BlackBag’s convenient MacQuisition.
Verification MD5 and SHA1
The verification information is hardcoded inside the metadata of the image in the case of most advanced forensic image formats such as E01, AD1, and AFF. A log is produced by any decent imaging software with a verification sum generated for the forensic image to signify the image is identical to the original. Verification is done so that the professional examining the image can be sure the image hasn’t changed since it was taken by checking the MD5 or SHA1 hash sum or other before commencing the investigation.
Fig 2 displays an example log auto-generated by AccessData’s FTK Imager. The imaging log gives forensic experts some information about the physical capacity of the disk, serial number and some of the notes I have used. In this case, the image was a server that was running a virtual machine. FTK imager was run live in this instance in the emulated environment, and the image was outputted to the emulated physical disk. Another option is shutting down the virtual machine image and logically copying and verifying the file or indeed the whole of the servers physical disk. Shutting down a server may cause financial loss to a firm and disruption if the server is in use. If it is on image the machine while it is in that state while taking notes, that is my recommendation.
Fig 2 – Example Forensic Imaging Log File Automatically Generated by FTK Imager Lite V3.1.1.8

Email E-Discovery Collection
Anyone collecting emails should be sure that emails on the local computer mailbox match the server. If they don’t then it is good practice to receive from both anyway and let the software de-duplicate the items, so you obtain a complete picture of the emails in the forensic search. Computers were after all invented to take the labour out of tasks.
Emails can appear in many forms (Lotus Notes NSF archives, Microsoft PST/OST’s, or individual EMLX or MSG files) and may not even reside on the custodian’s hard disk or smartphone under investigation. Other places they could be discovered are on enterprise servers, as a fragment in the deleted areas of a hard disk or even on the cloud via services such as Gmail for business or Microsoft 365. The email archive may also carry encryption so you may get a Lotus Notes NSF email archive file; without the unlock ID and a tool to open you will run into trouble, which goes for password locked PST’s too.
A computer forensic collection of emails may be as simple as collecting a PST email archive file that resides locally on an individual’s laptop, server or user share.
A more complex instruction may need the collection of specific emails that contain only certain keywords on a Microsoft Exchange server while keeping the integrity of the email attachment/mailbox structure. In these more complex situations an E-Discovery collection expert and your client may need to cough up for Discovery Attender by Sherpa Software, this excellent program plugs into your exchange server and can search, filter and extract onsite. You could also attach FTK with an enterprise agent or even image the whole disk and search from that image onsite.
I have created a summary guide below of the best tools in my experience in email E-Discovery collection:
Summary of Email Formats and Best Tools for E-Discovery Email Collections
- Local PST/OST Just logically collect an image using FTK Imager or similar. Be sure to hash verify the collected items if copied and make notes!
- Webmail such as Gmail/Hotmail/Yahoo/365 Etc Use Intella’s PI or the chopped starting at $100 for a 10GB case limit. Using IMAP settings (and permission!) you can collect the whole remote email archive as the binary file and export as a PST file. All these actions carry a full audit log. Many webmail providers such as Gmail have a built-in option to backup and download the whole archive; you may also consider this.
- Microsoft Exchange Database It is possible to just download the whole EDB file and process in FTK 5.6 the full version or later. You could export different custodians as a PST, search, and filter if needed. If you need a few custodians, then something like MessageOps is convenient. You can install the software on the server, and with admin, credentials run through and select the custodians you wish to export from. The results are outputted as nicely packaged PST’s along with a log file for verification. Dated indigenous X-merge can also export mailboxes as a PST, but it has a 2GB limit and can be a pain in more extensive collections.
- Lotus Notes The mailbox can be exported from the custodian machine in its entirety in the GUI options of the mail user interface. This approach is great if you have a few especially the admin ID file that contains the decryption keys. Then Proofinder or FTK 5.6 or later can be used to mount and read these archives. You may want to collect direct from the server. In the live environment, you may find the archives don’t copy. Use Teracopy or Robocopy or something similar to copy stubbornly locked files in a live setting. It is quite likely Samsung, or similar doesn’t want its Lotus IBM Domino database of 1000 users shut down for 20 hours while it is being imaged! If you have never encountered Lotus Notes before it is because it is antiquated and belongs in the dustbin of history; you needn’t a Delorian or the Doc to go back in time a few minutes in the dated GUI with fool anyone into thinking it is 1994!
- Loose or Deleted Emails These can be recovered from the server or local by using a data recovery program such as the ugly but effective photorec as shown below Fig 3. Data Recovery should be made from a previously produced forensic image. If an image is not possible an experienced computer forensics collection expert would run photorec live from an external disk and output the data to that same external disk. Emails may also be logically recovered from the email admin interface or reside on the server even though they have been deleted from the custodian’s machine.
Warning: Do not install data recovery software to the drive you wish to recover from or worse still output the retrieved data to the source drive.
Fig 3 – PhotoRec TestDisk’s Beautiful and Modern User Interface

Physically Forensic Imaging Using a Hardware Writeblocker
Many Computer Forensic companies such as Compute Forensics choose to use a hardware write blockers in many instances. A writeblocker is just a device that halts any writes to the disk from the forensic examination system when copying or viewing. This is shown in Fig 4. A computer forensics examiner would then go on to attach this device to a USB 3.0 socket on the examination computer’s USB 3.0 port for optimum speed. Making sure the evidence disk is in ‘Locked Mode’ it can be attached to the device. The disk should then show up in Windows Explorer and FTK Imagers ‘Add Evidence’ GUI option. The device should now be safe as it is now attached to a hardware writeblocker.
Writeblocking devices used to cost £1000’s but recently Compute Forensics discovered a decent one built by CoolGear. The Coolgear forensic imaging device has USB 3.0 support and images 2.5″ and 3.5″ sizes of SATA drives. You can pick one of these up for £40.00. I, Alistair Ewing, have tested the CoolGear forensic writeblocker and am content with the performance. It is fast and reliable.
Imaging Bottlenecks
The device will only read/copy as fast as the slowest component. On average it takes 4-8 hours for one disk to complete despite companies boasting 500mbs second speeds the device will image anywhere from 1mbs to 80mbs-100mbs. A skilled examiner can copy up to 8 drives at once, much like spinning plates. Collection costs can start at around the £700 a day mark dependant. If you are a company instructing us, please don’t complain if your rickety 15-year-old IDE disk is taking too long to copy!
Fig 4 – CoolGear USB 3.0 Forensic Writeblocker Attached to a 3.5″ SATA Hard Disk Drive
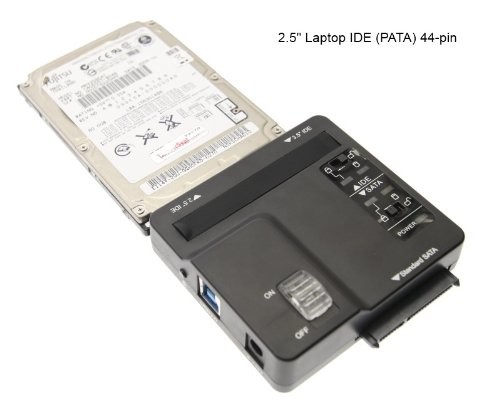
Forensic Imaging Using any SATA/IDE to USB Adaptor and Software Blocking
Another unorthodox method I have used in the past when the drive attached to the write blocker won’t read, or you need a special adapter that isn’t IDE or SATA. This method uses a software blocker and a USB to SATA, IDE, memory card or whatever adaptor. Make sure the destination drive is a USB 3.0 external drive for speed. A software writeblocking program is used in this instance. Usage is simple but also easy to screw up.. Royally! The steps are:
1) Plug in your destination drive.
2) Start Ratool or Thumbscrew and select ‘Block USB Storage Devices’ and then apply changes.
3) Plug in a test USB disk and try and delete format it. Windows shouldn’t allow writing access to this disk.
4) If it does repeat step 2) & 3) until the drive is blocked. When blocked it is safe to plug in the USB disk and adapter in the port that you plugged your test device into the system.
5) Now you should have your destination writable (anything previously plugged in will be writeable too) and your evidence USB stick, Drive or Card plugged in but blocked.
6) Use your favourite imaging software such as FTK imager or Magnet Aquire. Output the full physical disk to your destination disk. Be sure to make continuous notes of what you are doing, videos, pictures of the system and be sure to check the image has been MD5 verified by the hash sum, then you can be sure the copy is identical to the original.
Forensic Imaging Using a Forensic Bootdisk or USB
Using a bootdisk is the preferred method as you don’t need to waste time opening up a drive. The operating system uses the system as a terminal device, and the hard disks are by default blocked. This method works on most Macs, Windows and Linux systems.
Caine, Paladin & Deft – 3 Free Computer Forensic Bootable Linux Distros
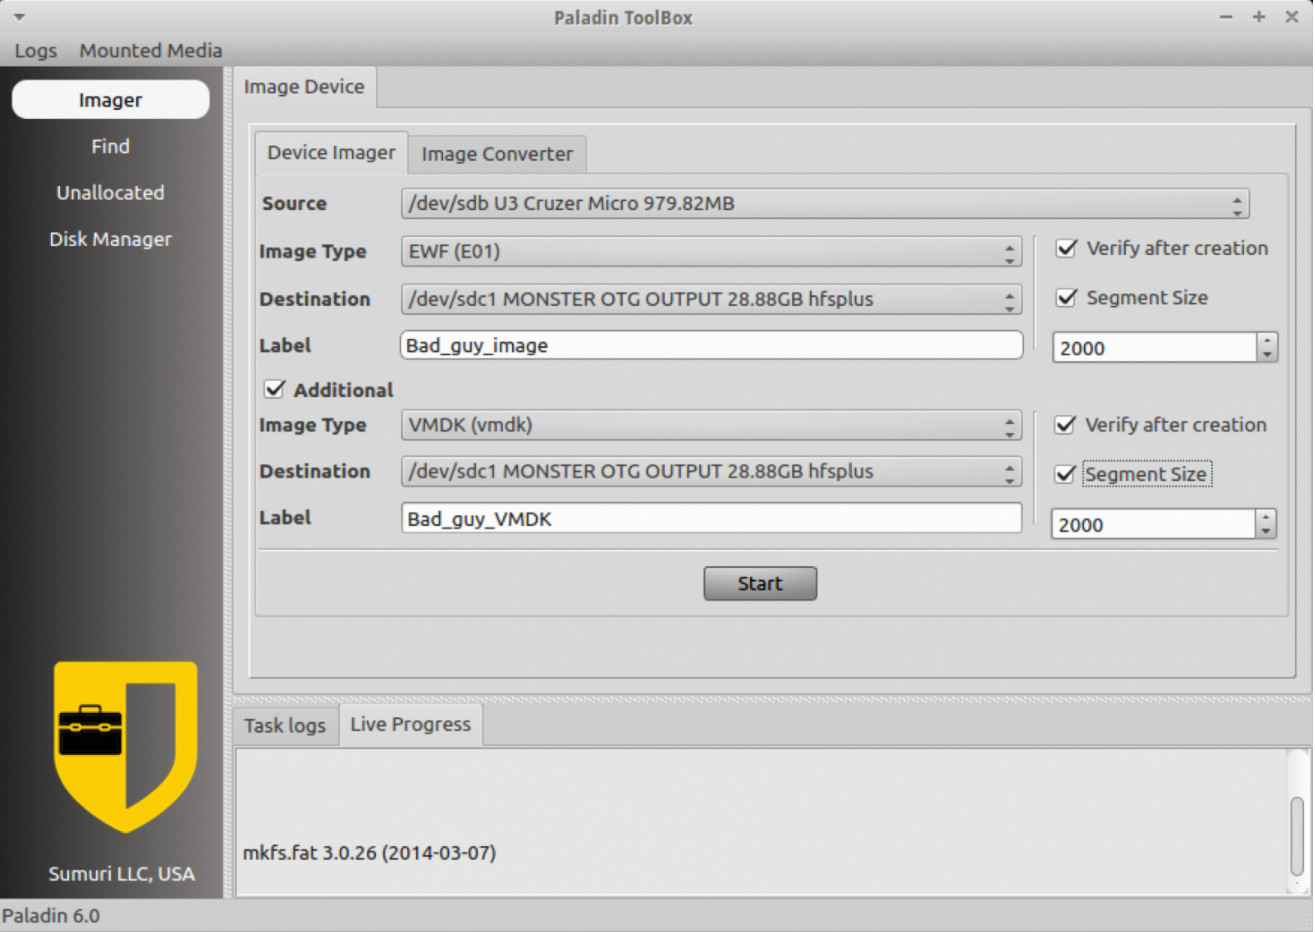
Firstly download a distro, my favourite is favourite is Caine. Famous actor Michael Caine assembles it (Only kidding it is made by Italian consultant Nanni Bassetti!). Another great free distro that you have to register to obtain is Suri’s Paladin, see Fig 4. Download the ISO from the website then burn the ISO to a DVD or use Rufus with default settings to make a bootable USB disk. To produce a bootable USB in Rufus merely select the USB stick, click the disk logo and locate the ISO you just downloaded then hit the start button and wait for your bootable USB to be prepared. Always have a copy of DEFT or Helixhandy on a compact disk rather than DVD in case you are working on a device that won’t boot from DVD or USB. from a device that won’t boot from DVD or USB.
Fig 4 Paladin’s ToolBox Imaging Graphical User Interface in Linux Running in Live Mode on a Host Machine
Booting Your Computer Forensics Distribution in the Bios
Before any booting of the system from a switched off state do some research into what key combinations trigger the boot disk. It varies, on a Mac hold the ‘Option Key’ or ‘C’, on a Windows system it could be anything from ‘F1’ or ‘Del’. Take time to look through this list before switching to the system in preparation for booting into a Forensic OS. If you get it wrong, you may boot into the operating system if this event occurs switch the computer off by the button (if safe) or pull out the power cord.
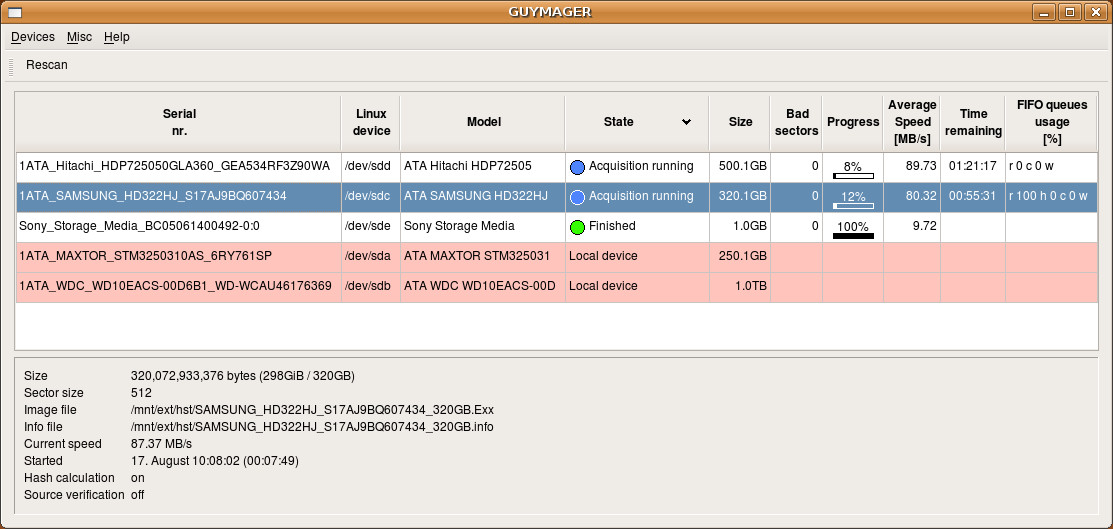
Then the general idea is to use a GUI program such a Guymager as shown in Fig 5 to acquire the media to the destination drive without removing the disk while preserving the integrity of the drive. You need to remember to unlock your destination drive.
Fig 5 Guymager Forensically Imaging 2 Attached Disks USB Disk
Remote Forensic Imaging over a Network
A computer forensic examiner would place a clean virus free computer on the network and attach to the companies domain. Using Encase Enterprise or FTK v5.6+ a computer forensic examiner, with root access, could push an agent to gain access to a remote system. The RAM could be examined for malware and Physical Disk in Read-Only mode. The examiner could then review the computer in real time to produce a logical forensic skeleton image of only the files that are of interest. Alternatively, the examiner could copy the disk remotely and have it outputted to a secure location on the server or locally.
If the user profile exists on the server, it might be sufficient to mount the remote disk or user share in logically in Windows by selecting ‘Map Network Drive’ and using FTK Imager to image the contents locally logically. The local machine should be physically copied where possible in addition to the remote user directory for completeness.
Forensic Imaging Mobile Phones – iOS, Blackberry, Windows and Android
If you come across a phone place it in aeroplane mode or switch it off immediately as it is easy to wipe a device remotely using iCloud’s ‘Find My Phone’ or Similar apps of that ilk.
For a mobile phone forensics expert Magnet’s free software Aquire, CellBrite, UFED and XRY can be used to grab an image logically and physically of a mobile device. A logical grab will obtain the filesystem and no deleted data (except items in the SQL databases that can be logically recovered and scraped from these databases).
A physical ‘Hex Dump’ of a mobile device is the holy grail of mobile acquisition. Hex dumping entails the device to be rooted or jailbroken as so a 3rd party app can exploit the phone allowing the device to be imaged much like a computer hard drive. From this image, deleted data can is gathered.
Mobile Phone Backups
It is also worth a mention that Mobilebackups in the form of BBB/IPD Blackberry backups and Mobilesync backups for Apple may exist on the computer system seized that can be read much like actual mobile device if for some reason the device is no longer available. These backups may contain messages, photos and chat conversations.
Thank you for reading my overview of forensic imaging. I hope it was informative.
By Alistair Ewing Director of Compute Forensics