Incident Response: Creation of a Digital Timeline of User Actions
- 28/06/2018
- Posted by: Alistair Ewing
- Categories: Computer Forensics, Investigative Techniques, Software
Log2TimeLine Production: the Crème de la Crème of Incident Evidence
What is the best method for analysing an intrusion or indeed for most computer forensic cases? It is the production of a super timeline. A timeline quickly highlights a chain of events that occur, a super timeline using a Linux based tool named log2timeline. This software produces the mother of all schedules. It merely creates an amalgamation of all the events contained within a system such as event logs, metadata, internet history and user actions and is an invaluable asset for analysis of a hacking event or incident.
If you are not proficient in computers or require an expert to produce and analyse this timeline, then please visit our website. Sans, a training computer forensics organisation, provided an excellent cheat sheet that can be viewed/downloaded from here. It is a little detailed, and I wanted to simplify it for those who never produced a ‘supertimeline’ before.
DISCLAIMER: YOU MAY NEED AN EXPERT TO DO THIS IN YOUR ORGANISATION AS COLLECTING THE DATA INCORRECTLY AND NOT DOCUMENTING STEPS MAY RESULT IN EVIDENCE THAT DOESN’T STAND UP IN COURT!
Log2timeline in Caine
Log2Timeline Basic Use
The tool ‘log2timeline’ can be executed against a remotely connected network device, an E01 or DD image or a mounted image directory using Linux. The easiest way to create one is the ‘Hail Mary’ approach, that is to say, dump all the data (web history, reg, link, evtx etc.), mount or present the image to Plaso or super timeline. Then output the ‘dump’ file to a storage medium. You can then use another command line tool to output the timeline to a useful format (CSV) or filter using dates etc. Calc or Excel can then be used to filter dates or other fields, beware that these office tools can panic when handling massive data sets 200mb+. 4n6time is a tool you can use to analyse the events graphically; there are others.
Example of Basic Log2TimeLine Usage the ‘Hail Mary’
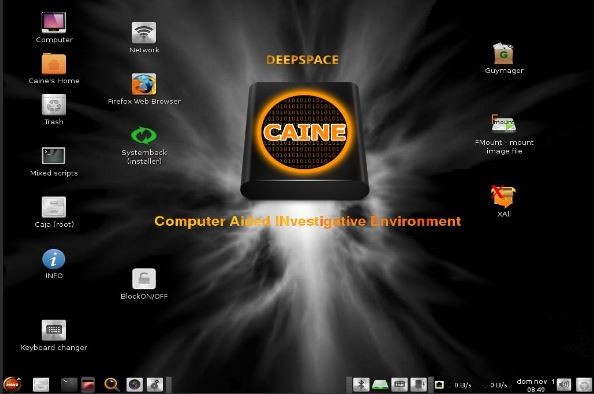
1) Download live Linux distribution Caine v7.0 or later. Boot this in a virtual machine such as VirtualBox or VMware. Alternatively, you could burn the iso or use Unetbootin to make a bootable USB version of the software.
Caine, My Personal Favourite Linux Forensic Distro
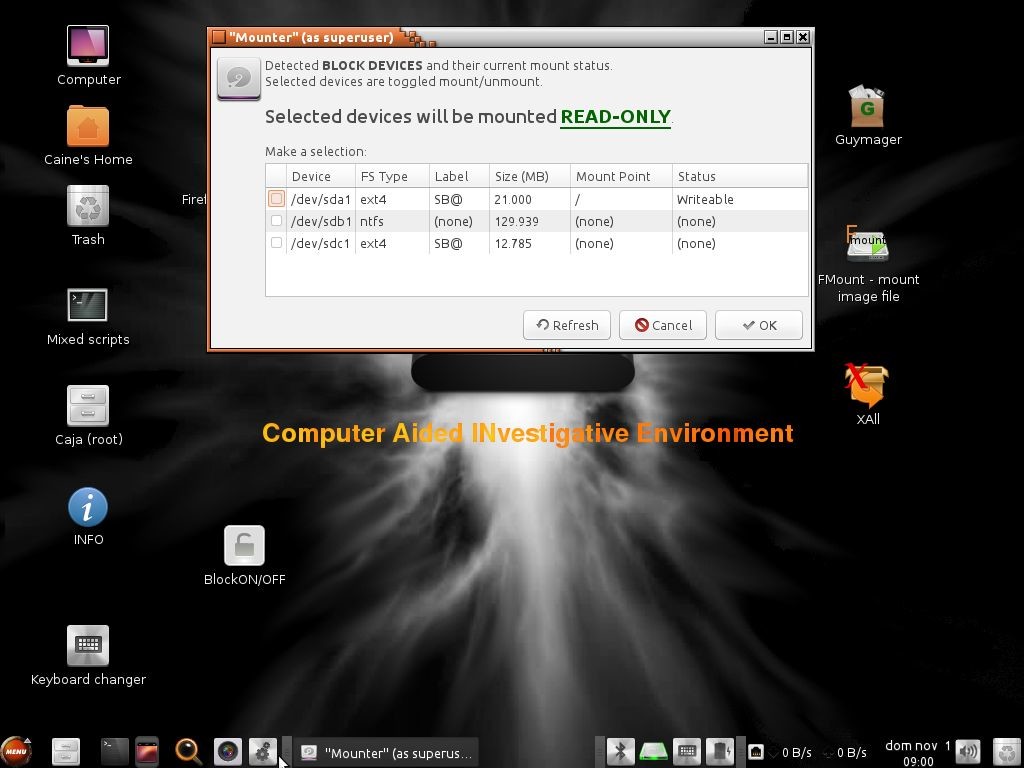
2) Connect your disk containing images in Read/Write by right-clicking on the disk icon and selecting R/W mode.
Read/Write GUI Mounting Icon
You have to select the disk desired using the tick box then select ‘OK’. You can use this disk to write your plaso timeline file. If live evidence is being used such as a server mount the location in read mode. Mount the image using one of the GUI tools provided in the Linux distribution Caine or point log2timeline to the actual image file. If the image is dd or even E01 you can just point the tool to the location path: remember to include the file name and extension. Have somewhere in read-write mode mounted to push the outputted timeline which will be a ‘plaso’ file.
Caine’s Mounting GUI
3) Update your system, Open Terminal [Optional may cause issues!]:
sudo apt-get update
Then upgrade it:
sudo apt-get upgrade
Be sure Ubuntu Universe is installed and available:
sudo add-apt-repository universe
Update again:
sudo apt-get update
Add the GIFT PPA:
sudo add-apt-repository ppa:gift/stable
Update again:
sudo apt-get update
Now install Plaso:
sudo apt-get install python-plaso
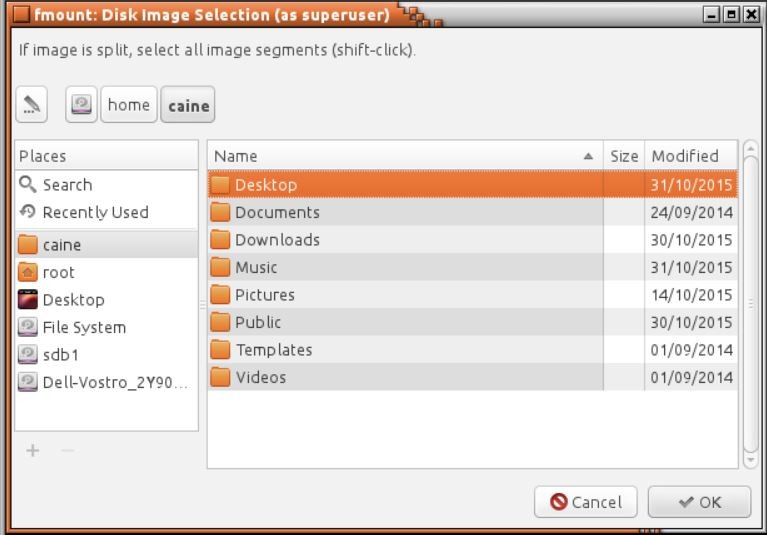
4) Mount the image using one of the 2 GUI mounting tools,FMOUNT is my favourite, in Caine v7.0. Another way is to is to point the program at the location of your image e.g.: ‘media/sdb1/foldertoputinimage/image.e01’ (remember to have no spaces in this path!
FMOUNT Select your Forensic Image (Split Images Supported)
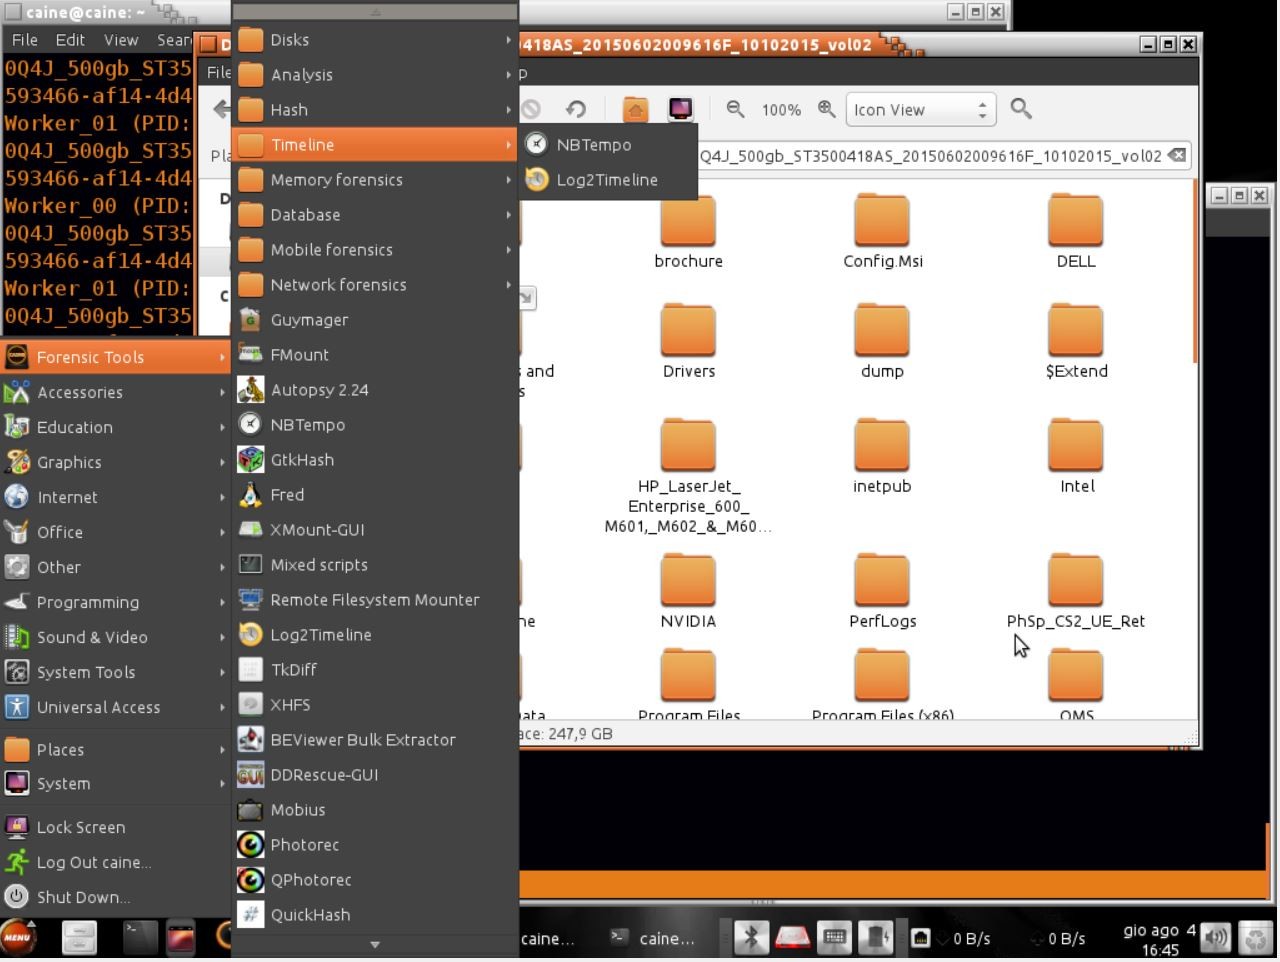
5) Create the Timeline: Paths can be copy and pasted from the web bar of Caine’s Explorer type interface.
Copy and Paste Paths from the Explorer, as Typing Long a Path can Result in Errors

Open log2timeline from the menu and enter something like this: [comments in brackets, do not use in Terminal!]:
sudo [admin command] log2timeline.py [The software used] -z Europe/London [z- is the time zone flag, be sure to use capitals and find your desired timezone dependent on the case here, pick the location desired and insert after flag] –status_view window [Adds status window optional can cause errors) /path/to/nameyourfile.plaso [output location] media/sdb1/foldertoputinimage/image.e01 [Windows or Image Directory the path can be copied from the ‘computer’ window similar to explorer]
Hit ‘return’ and wait. The process may take a long time.
6) Output the timeline into another format, open Terminal and input something like this:
sudo psort.py -o [Output Format CSV] l2tcsv w- [Storage Path] /mnt/hgfs/CaseSensitiveWindowsPath/YOURCSVTIMELINE.csv [Location of your Plaso Dump] /mnt/hgfs/CaseSensitiveWindowsPath/nameyourfile.plaso
7) Viola! You have produced your very own supertimeline.
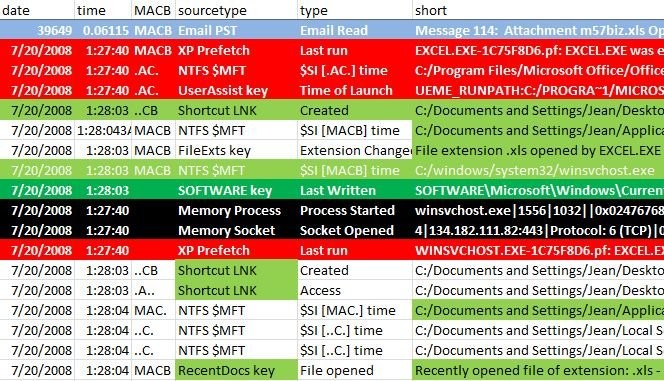
8) For an analysis in excel or calc, the contents of the spreadsheet may be pasted into a template found here.
- Download it – Open Timeline Color Template
- Switch to Color Timeline worksheet/tab
- Click on Cell A-1
- Select ‘DATA’ Ribbon
- Import Data “FROM TEXT”
- Select log2timeline.CSV file
- TEXT IMPORT WIZARD Will Start
- Step 1 -> Select Delimited ->Select NEXT
- Step 2 -> Unselect Tab under Delimiters -> Select Comma under Delimiters -> Select NEXT >
- Step 3 ->Select Finish
- Where do you want to put the data? Simply Select OK.
- Once imported View -> Freeze Panes -> Freeze Top Row
- Optional Hide Columns Timezone, User, Host, Short or Desc (keep one of these), Version
- Select HOME Ribbon
- Select all Cells “CTRL-A.”
- In-Home Ribbon -> Sort and Filter – Filter
Resources:
https://github.com/log2timeline/plaso/wiki